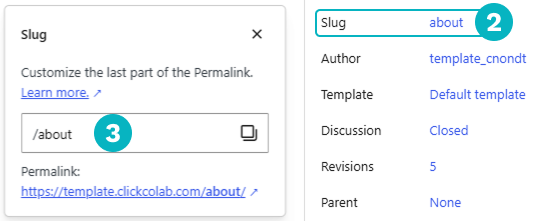
- Follow steps 1-4 of the WP Editor to load the editor for that page.
- On the right sidebar, click Slug
- Edit the link (or “slug” ) to be the new link.
- Click Publish
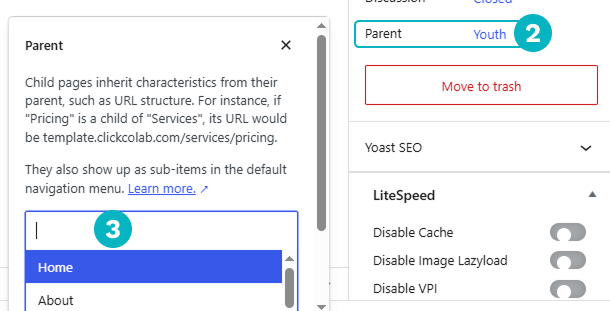
- Follow steps 1-4 of the WP Editor to load the editor for that page.
- In the right sidebar, click Parent
- Set its parent page
- Click Publish
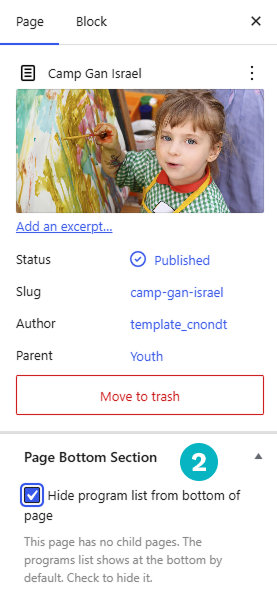 Follow steps 1-5 of the WP Editor to load the editor for that page. Go the page you want to edit (i.e. yourwebsite.com/about)
- In the Page tab in the right sidebar, click Hide program list from bottom of page
- Follow steps 1-4 of the WP Editor to load your Admin Dashboard. Click on the tab M.E. Calendar on the Dashboard sidebar.
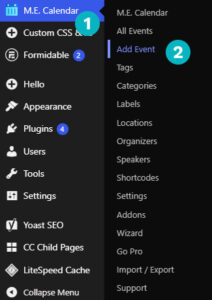
- Click Add Event.
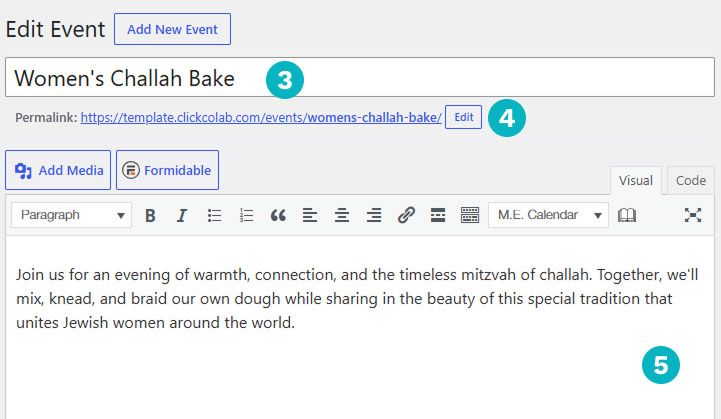
- Add a title to your event.
- Note that the title of your event automatically becomes the “slug” or link of your event. If you want to change that (i.e. change the link yourwebsite.com/womens-challah-bake to yourwebsite.com/challahbake), simply click Edit and change the link to whatever you’d like.
- Add a short blurb about your event in the description area located under the title.
- Scroll down to the Details section. This is where you are going to customize all the details of your event. Add the date and time of your event. In the Advanced section, you can hide the event times if you wish.
- If this event occurs more than once (like a weekly Torah class or monthly Rosh Chodesh program), click on Event Repeating, where you can set the event to recur however many times you want. You can also set the event to stop recurring on a certain date.
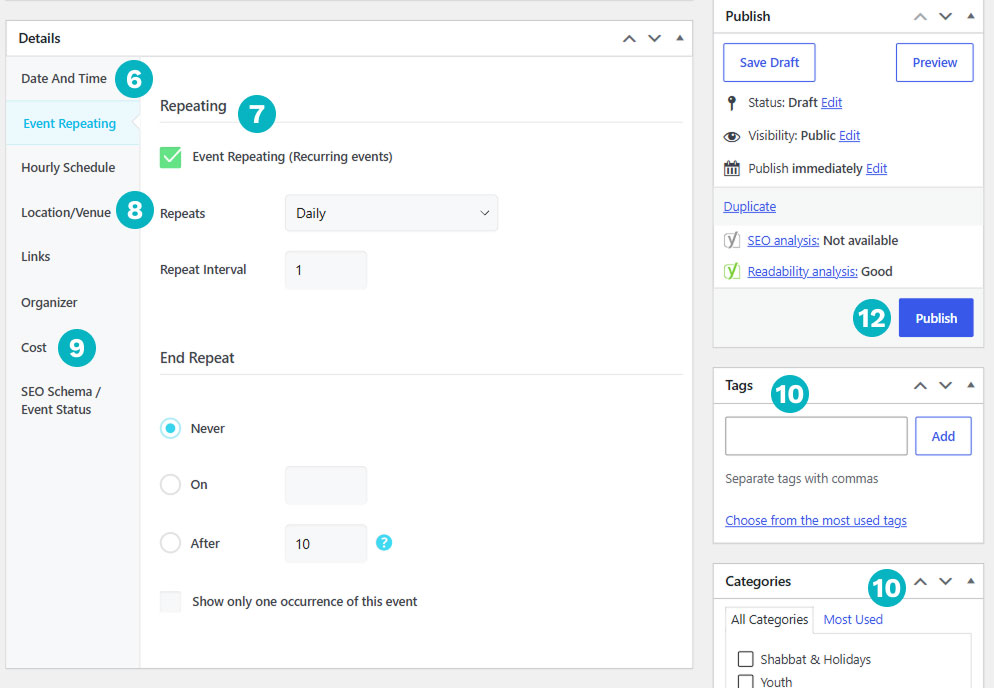
- Set the location of your program by clicking on Location/Venue.
- Set the cost of your event by clicking Cost.
- On the right side of your screen, you’ll see other sections such as Tags or Categories (and others), which are different ways to organize your event. You can apply the appropriate categories and tags to your event.
- Scroll further down until you see the section labeled Featured Image, which is on the right side of your screen. This image will be how the event appears on your calendar and on the event page. Click Set Featured Image and either upload a new image or select an image from your media library.Recommended size for featured images: 1129 × 599
- Scroll back up and click Publish. If you just want to save your progress but aren’t ready to publish, click Save Draft. Your draft can be found in the All Events section.